On Physiological Introspection and a “Clean Slate” Six-Week Diet

Happy 2016, beloved readers! With support from my phenomenal therapist, friends, and family, 2015 was a year of intense emotional and mental introspection. It’s been a mess, but the awesome kind – the sort where you throw all the junk from your drawers onto the floor and see all the ridiculous and wonderful things you’ve been holding onto for years. To supplement this ongoing work, I thought it would be great to pair this work with a more physiological self-analysis. For years I’ve been rather unkind to myself, and I’m curious about how I can be more thoughtful about my body’s needs.

c_mangia_che_tipassa1

My husband recently read a book called Mangia che ti passa: Uno sguardo rivoluzionario sul cibo per vivere piu sani e piu a lungo by Filippo Ongaro, who is an Italian physician and expert in functional medicine. Basically, the book discusses nutrigenomics, a multidisciplinary science which studies how food affects our genes, and how individual genetic differences can impact the way we respond to nutrients (and other naturally occurring compounds) in the foods we eat. Essentially, what we eat gives our bodies messages, and these messages contribute to making us feel good or feel bad. Ongaro suggests that it’s important for people to understand how different foods affect our bodies, and recommends we do this by: (1) creating a clean slate for our bodies through a 6-week elimination diet; (2) slowly reintroducing principal food allergens; and (3)  following 10 simple rules. I’m not sure how interesting this is to folks, but I thought it might be helpful to share these three strategies.

Elimination Phase (6 week diet)

This elimination phase helps one to create a baseline in order to determine food allergies and intolerances.

  • What to eat
    • Fresh fruit (except citrus)
    • Vegetables
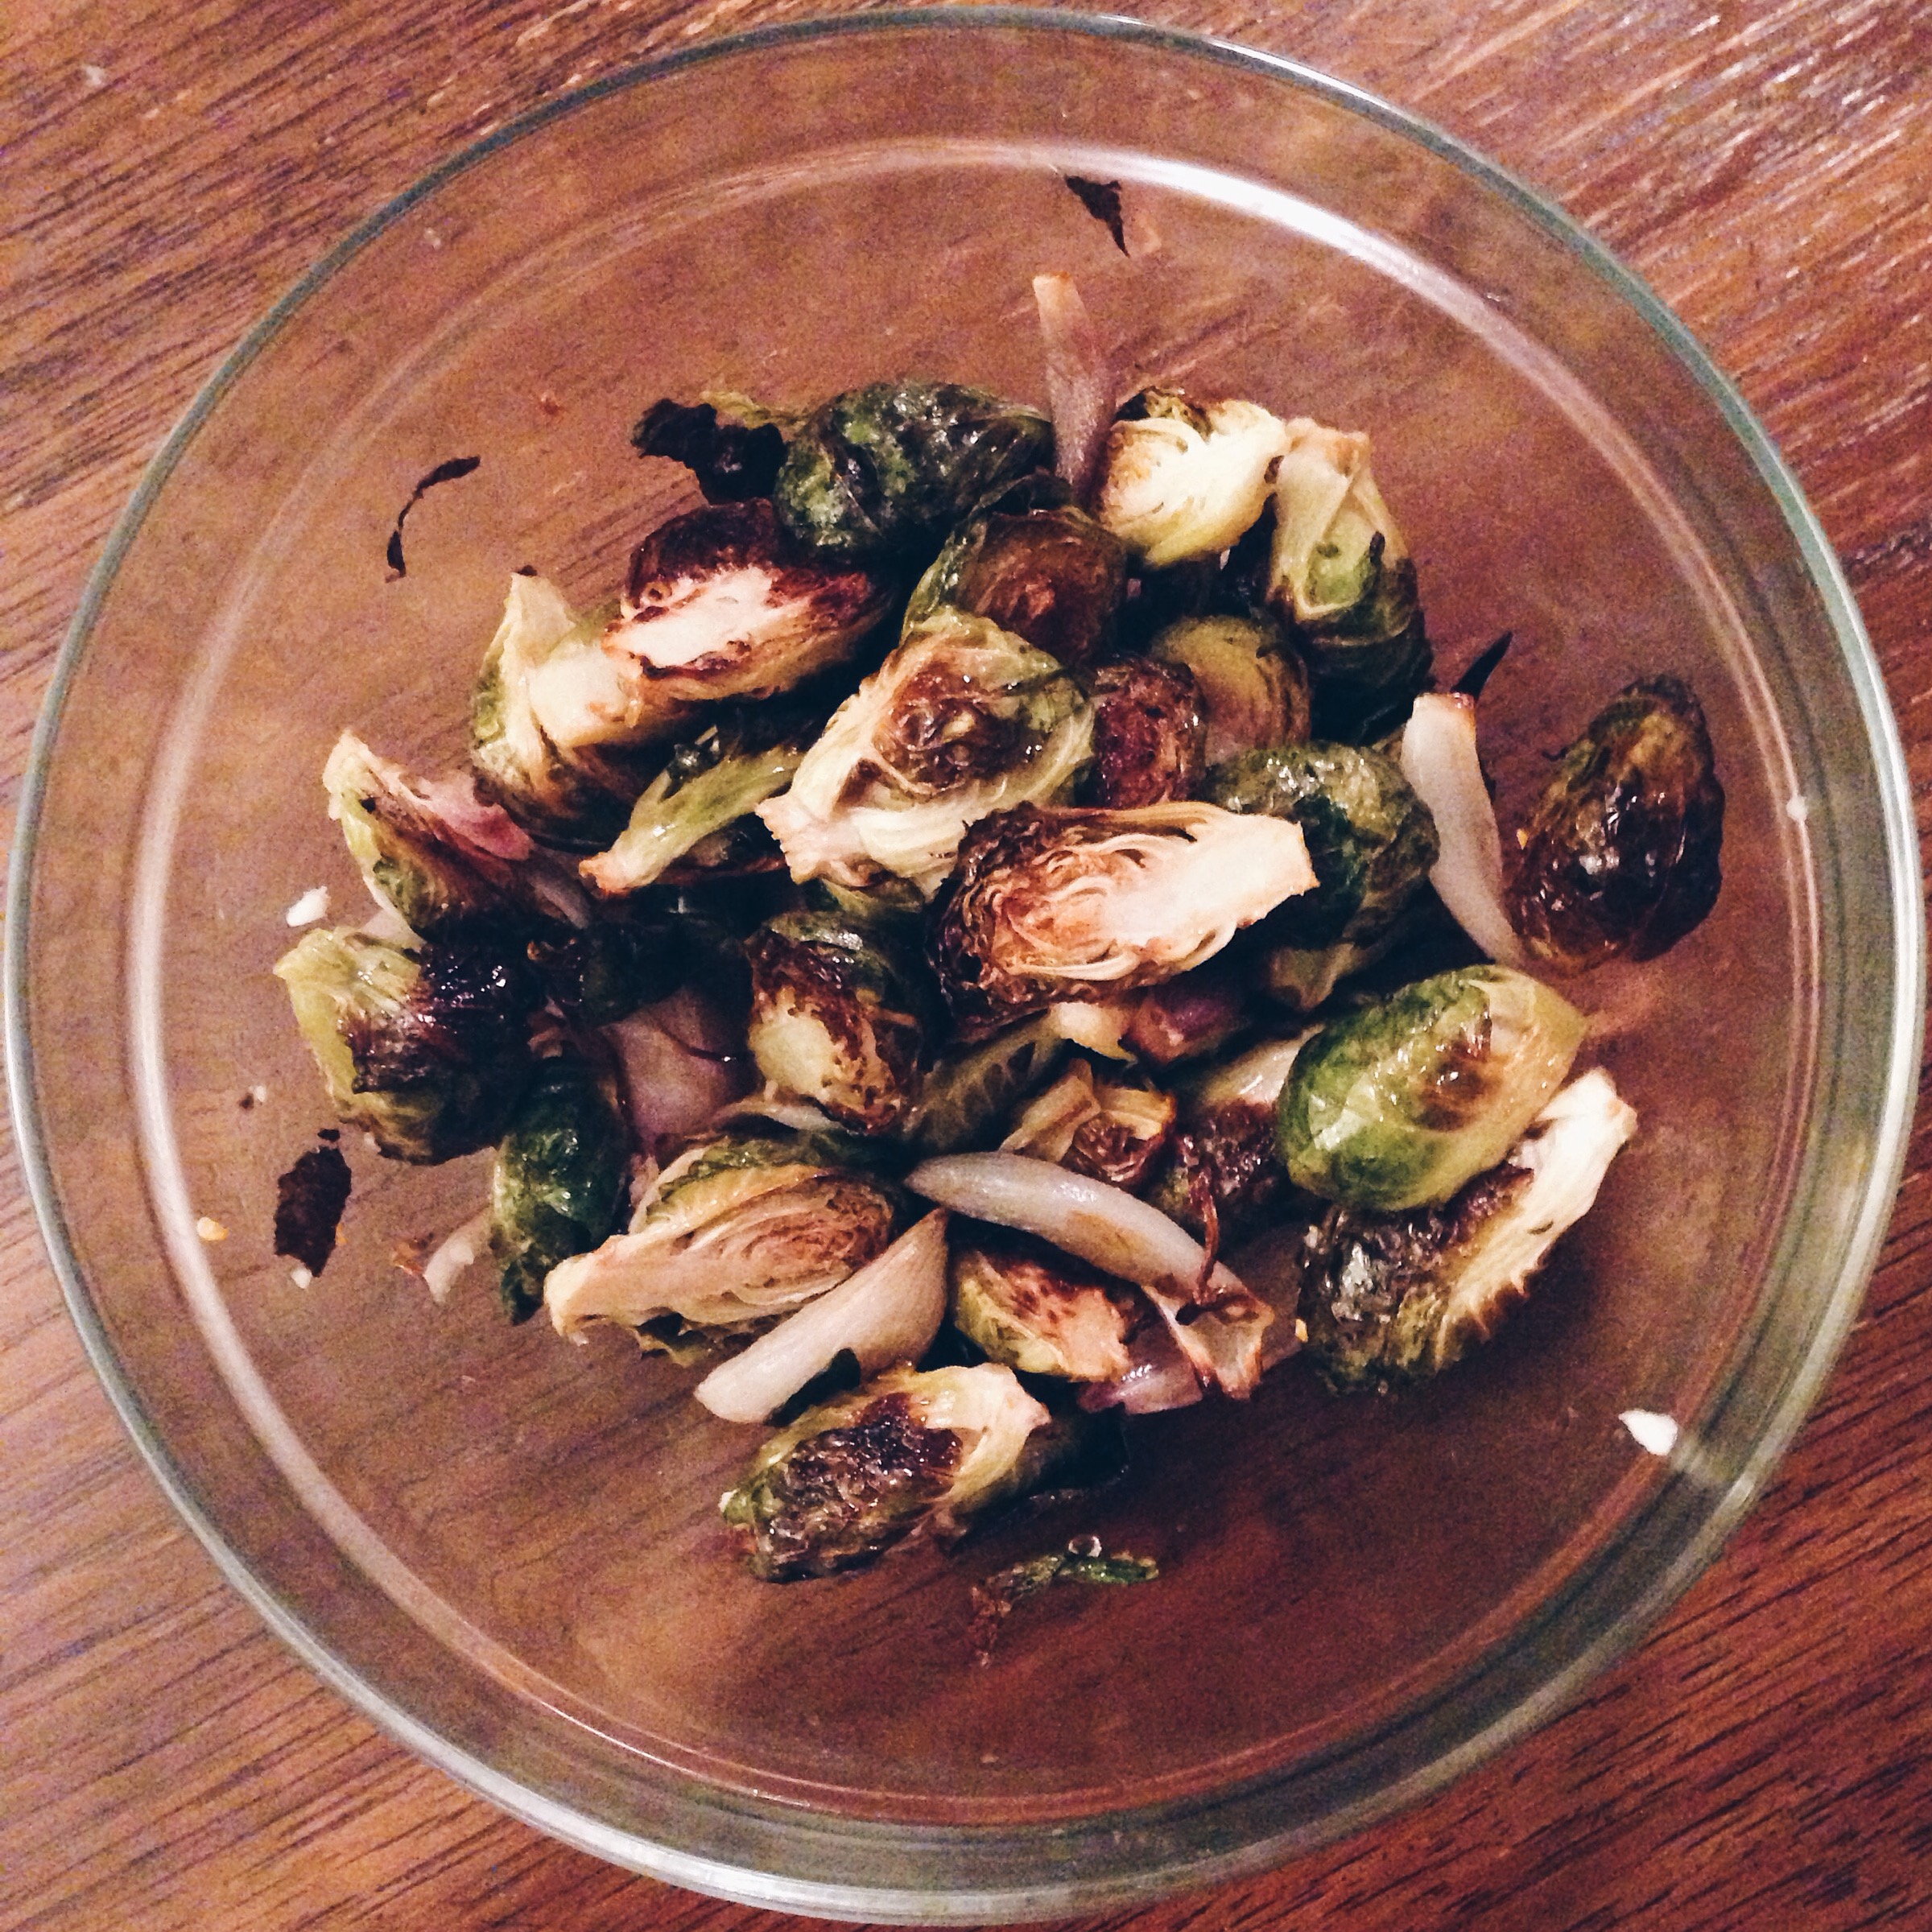
      • Especially good: broccoli, cauliflower, brussel sprouts, artichokes, spinach, cabbage
      • To eliminate: tomatoes, bell peppers, eggplants
    • Legumes
    • Spices in natural form (e.g. curry, ginger, wasabi, cinnamon, peperoncino, rosemary)
    • “Milk” – coconut, rice, almond
    • Whole grain rice
    • Olive oil
    • Fish (especially salmon, sardines, mackerel)
    • Meat: chicken, turkey, or lamb (avoid red meats)
    • Nuts and seeds, unsalted
    • Green tea, herbal teas, no caffeine
  • Principal allergens to eliminate:
    • gluten, milk (and derivatives), eggs, products with yeast (wine, vinegar, bread), corn, peanuts, tomatoes, eggplants, peppers, potatoes, oranges, lemons, grapefruit
  • Additional foods to avoid:
    • grains rich in gluten (oats, rye, semolina, malt)
    • processed foods, bread, crackers, toasties, potatoes, sugars, high fructose corn syrup, artificial sweeteners, artificial colors, hydrogenated fat, marjoram, caffeine, beef, peanuts, booze, cold cuts, sausage, meat with skin, fruit juice, liver and organs, olives

Reintroduction Phase (after 6 weeks)

  • Foods to reintroduce slowly after 6 weeks
    • Eggs
    • Whole wheat bread and pasta
    • Oats
    • Red meat
    • Peanuts and peanut butter
    • Olives
    • Milk and milk derivatives
    • Coffee (2-3 / day)
    • Wine (3-4 times a week)
    • Etc.
  • For reintroduction, start with gluten. The day you reintroduce bread, eat a lot of it. Wait 48 hours, but without introducing anything else. Observe possible symptoms (headache, nausea, diarrhea, cramps, slouchiness). If symptoms occur, eliminate this food forever. On the contrary, if no symptoms occur, you can eat it regularly. After 72 hours, introduce another element.
  • Reintroduce things one at a time.

10 Rules

  1. Reduce glycemic load (sugars, jam, honey, soda, pasta, alcohol)
  2. Eat breakfast
  3. Distribute calories throughout the day (eat every 2-3 hours)
  4. Reduce stress
  5. Use breathing to reduce hunger and eat more slowly (take five breaths before eating to activate parasympathetic nervous system)
  6. Do not eat 2-3 hours before bed
  7. Aim at reducing abdominal circumference (belly fat produces tnf alpha and other inflammatory things that slow metabolism)
  8. Eat lots of fruits and vegetables
  9. Speed up your metabolism through exercise
  10. Conduct a liver detox (green tea, artichokes)

So, basically, for the next six weeks we will not be eating gluten, dairy products, red meat, and sugar.

It sounds terrible, right? The point of course is not to lose weight or to permanently eliminate delicious things from my diet. That would make me so very sad. The purpose is to better understand how my body works, and how it reacts to things that I love. I will diary my experiences, and will pay particular attention to how I respond to the reintroduction of principal allergens. If, for example, I find that bread makes me lethargic, I will avoid it during times of great stress. As you may know by now, I LOVE having parameters when planning my meals. The secondary goal for me is to learn how to make my food delicious in spite of the sad face limitations of this diet.

For now, I plan to share my weekly menus with you, but if that becomes too annoying, feel free to let me know!

Menu of Meals for Week 1 (January 3rd-9th):

Sunday, January 3rd

  • D: Mooshu chicken with brown rice & garlic bok choy and miyuk guk (Korean seaweed soup) with mussels
  • Make:
    • Chicken broth for week
    • Roasted broccoli
    • Roasted cauliflower
    • Big batch of brown rice
    • Make miyuk guk
    • Make juk

Monday, January 4th

  • B: Miyuk guk with brown rice
  • L: Juk (Korean rice porridge) with shredded boiled chicken and roasted vegetables
  • D: Rice noodle and vegetable stir fry with broiled salmon and sauteed spinach

Tuesday, January 5th

  • B: Spiced quinoa porridge w/ cinnamon, nutmeg, ginger, dried fruits, and nuts
  • L: Leftover rice noodle stir fry with broiled salmon and sauteed spinach
  • D: Steamed Spanish mackerel  w/ soy, ginger, and scallion sauce & jasmine rice & roasted cauliflower and broccoli

Wednesday, January 6th

  • B: Leftover jasmine rice, steamed fish, roasted broccoli
  • L: Leftovers
  • D: Italian wedding soup with turkey meatballs, kale, and escarole and steamed brussel sprouts

Thursday, January 7th

  • B: Sliced apples with almond butter
  • L: Leftover Italian wedding soup
  • D: White bean, shallot, and cabbage saute w/ quinoa and steamed brussel sprouts

Friday, January 8th

  • B: Pumpkin quinoa porridge
  • L: Leftover white bean, shallot, and cabbage saute
  • D: Lentils & brussel sprouts with brown rice

Saturday January 9th

  • B: Sliced apples with almond butter
  • L: Leftover lentils & brussel sprouts with brown rice
  • D: Roasted butternut squash, chickpea, and coconut curry w/ brown rice

Sunday, January 10th

  • B: Fruit
  • L: Leftover roasted butternut squash, chickpea, and coconut curry w/ brown rice

Coming Up…Meal Planning 101: A week of meals for those moments when cooking seems like the worst thing ever, plus Week Two of the elimination diet

Meal Planning 101: On Cooking with Limited Time and Energy, plus a Menu of Meals

A couple of entries ago, I shared with you all my maniacal approach to finding co-curricular fulfillment and how my body failed to keep up. After a much-needed therapy session, I had hoped that I would easily be able to drop an activity or two, or at least dampen my must-approach-everything-with-100-percent-intensity modus operandi. No dice. I tend to feel like there is no point to doing anything if I’m not giving it my all, or producing at high levels. In any case, it is clearly (and frustratingly) going to take me a long time to figure out why my drive seems to be so dogmatic, unforgiving and cruel. In the meantime, however, I need to make more time for myself, but how do I do that? I refuse to drop my Italian tutoring sessions. I shouldn’t give up my volunteer work. I will always make room for my husband and my dog. Spending more time with my friends/chosen family is generative and important. And at this point, I need to strengthen my body so that it can better withstand stress, so I won’t be canceling my gym membership anytime soon.

I mentioned to my therapist that I have been cooking an average of 2-3 hours per day for the last two months, and that more than half of every week’s meals were brand new dishes and experiments. I also articulated that I feel a building internal pressure around cooking (because I need to measure personal achievement) and this blog (because I need external validation for my personal achievements). Though I continue to experience a great deal of joy when I cook and eat, I’ve found myself getting grumpier in the kitchen. I HATE being grumpy when I’m around food. So, I decided that I would try to forcibly de-escalate my growing personal expectations around cooking. And I’m doing this by setting parameters. This week, I will spend no more than an average of 45-minutes/day cooking our meals. 

I know I may be in the minority when I say this, but planning is awesome. If you spend a little bit of time intentionally crafting your week’s meals, particularly when you know you’ll be frenzied and busy, I promise it will really help you save both time and energy. Here are some of the things to consider.

Note, I’ve added gifs to make this more exciting. 

Prepare stock items when you have some free time and stick that shit in the freezer.

I can’t tell you how amazing it is to open the freezer and see an arsenal of useful homemade goods, like tomato sauce, chicken or vegetable broth, ragu, dough, or dumpling skins. In the fall and winter, I’m very frequently cooking soups, stews, and risotto, so I always make sure to have some broth in hand. Actually, making broth is one of my most favorite things to do. Since it takes a few hours, I’ll usually position myself in front of the TV and occasionally return to the kitchen to skim off some fat. This process forces me to relax, which is something I desperately need help doing. In any case, several of this week’s dishes require chicken broth (split pea soup, garlic rice, farro). If it’s already made, the amount of time I’m spending preparing and cooking decreases a lot. A lot a lot.

Choose dishes that utilize a crock pot.

I used to think crock pots were for cheaters, but I was wrong – they are simply amazing. If you don’t have one, ask for one for the holidays, or treat yo’self. They’re only like $30.

Because things are being consistently slow-cooked or braised, there is really no need to check on your dish, and usually you can just plop all your ingredients in at once, cover the lid, and call it a day. I don’t know about other people, but I feel comfortable leaving the appliance unattended, especially if the setting is on “low.” This means you can make something overnight, or cook your delicious meal while you’re at work. I did once make the grave mistake of making slow-cooker ragu overnight. The smells were so amazing and distracting, that sleep did not come so easy. This week, I’ll be using the crock pot for split pea soup.

Choose meals/dishes you know so well that you no longer need to use a recipe.

Whenever I make something new, my brain is tired from the experience, even if it only takes 30 minutes to prepare and cook. Perhaps it’s because I’m some mutated form of a perfectionist, but there is something kind of exhausting about quadruple-checking ingredients and instructions when I’m already sort of spent from the day. If I don’t need a recipe, it usually means a dish is relatively simple (even if I’ve made a beef bourguignon dozens of times, I cannot for the life of me remember how much of everything to use). These are always pretty good go-to meals when you have limited time and energy. This week, for example, I’ve included these dishes that I can cook easily, quickly, and from memory: (1) penne w/ cauliflower, bacon, and peas; (2) Korean pan-fried fish fillets (jeon); and (3) farfalle w/ smashed broccoli and garlic.

Pick dishes that require fewer ingredients.

Last weekend, I cooked the best stew I’ve ever made (lamb tagine), but it took forever, and I used about a zillion spices. It was totally worth it, but this is not the sort of thing I’m about to make when I’m stressed and have little time/energy. This week, I chose entrees and side dishes that are simple so I don’t have to think about much. For example, the Korean fried fish fillets require a white fish, salt, flour, and egg, and the side requires chopped bok choy, garlic, water, salt, and white pepper. One of the pastas has bacon, cauliflower, and peas, and the other entree simply has boiled broccoli, garlic, anchovies, and olive oil. Obviously, if you’re using fewer ingredients, than you’ll have less shit to prepare and cook. SCIENCE.

On days when you have a little more time and energy, prepare and/or pre-cook your side dishes.

When I’m feeling especially drained, I get annoyed when I have to split my energy/time between cooking an entree and side dishes. So, sometimes it is really helpful to pre-cook certain side dishes. For example, one can cook a bunch of rice, store it in the fridge, and reheat the amount you need for each meal (the refrigerator life of cooked rice is usually between 4-6 days). You can do the same thing with blanched vegetables (though it’s always good to look up the refrigerator life of different cooked vegetables). I also find that on some days, I love chopping vegetables. I usually take advantage of those spurts, look at my meal schedule, and chop up items for use the next few days.

When cooking your dinners, make enough so you can have leftovers for lunch. 

I am really not a morning (or evening) person. Is it possible to be an afternoon person? That sounds super lame. In any case, I don’t like to spend time doing anything in the morning before work – I can barely get myself to take a shower and chug a cup of coffee. All this to say: I despise preparing lunch for myself in the AM. For me, it is a billion percent better to pack dinner leftovers and just shove some filled tupperware into my purse.

So, with all this in mind, here is the menu for the week:

Menu of Meals: Week of November 9, 2015

  • Monday
    • L: FEND FOR OURSELVES
    • D: Korean pan-fried white fish (jeon) with jasmine rice and garlic bok choy
  • Tuesday
    • L: Leftover fish jeon
    • D: Hainanese chicken with garlic rice and spicy cucumber salad
  • Wednesday
    • L: Leftover chicken and rice
    • D: Farfalle w. smashed broccoli and garlic
  • Thursday
    • L: Leftover farfalle
    • D: Split pea soup w/ baguette and salad
  • Friday
    • L: Leftover split pea soup and bread
    • D: Chicken fried rice and sugar snap peas
  • Saturday
    • L: Leftover fried rice
    • D: Penne w/ cauliflower, peas, and bacon and sautéed garlic swiss chard
  • Sunday
    • L: Leftover penne
    • D: Freekah or farro salad with roasted kale and cabbage and fried egg

Coming Up…Five Cooking Tools I Cannot Live Without, plus a Poll for What Recipe to Share Next

Meal Planning 101: On Creating a Menu for Dinner Guests, Plus Recipes Abound!

Disclaimer: I am back to my verbose ways, and this entry is long. My promises mean nothing, but I’m pretty sure the next post will be short. Bear with me!

Psst. Want to know a secret? I’m an effusive person.

Gasp! It’s probably painfully obvious that I lack restraint when demonstrating and articulating my love for people (and food and TV). Why? Enter the Myers-Briggs Personality Test. Though I don’t fully buy into it, I’ve found the test and its analysis helpful in understanding what motivates me. And, true to obsessive form, I’ve taken the Myers –Briggs Personality Test at least 10 times in my life, all with the same result. I am solidly an ENFJ. According to 16personalities.com:

ENFJs are natural-born leaders, full of passion and charisma. Forming around two percent of the population, they are oftentimes our politicians, our coaches and our teachers, reaching out and inspiring others to achieve and to do good in the world. With a natural confidence that begets influence, ENFJs take a great deal of pride and joy in guiding others to work together to improve themselves and their community.”

There’s the good. Here’s the rub:

“While ENFJs enjoy lending this helping hand, other personality types may simply not have the energy or drive to keep up with it – creating further strain, people with the ENFJ personality type can become offended if their efforts aren’t reciprocated when the opportunity arises. Ultimately, ENFJs’ give and take can become stifling to types who are more interested in the moment than the future, or who simply have Identities that rest firmly on the Assertive side, making them content with who they are and uninterested in the sort of self-improvement and goal-setting that ENFJs hold so dear.”

Stifling. I’m stifling! Oh god. Oh yikes.

So, in the last year I’ve been trying to redirect my somewhat manic desire to demonstrate (and receive) love in my ideal form* towards something more palatable and enjoyable for all parties. I do this by cooking for people.

*ideal form: I hold your face in my hands, you hold my face in your hands, we look deep into each other’s eyes and talk about the ins and outs of everything we hold dear until our souls are exhausted by satiation.

310775_934080433177_54748829_n

This is generally what it looks like when I love someone.

Though I’m still a bit intense whilst coming up with a menu for dinner guests, at least my friends won’t feel suffocated from my effort – they’ll just eat something that is hopefully tasty and comforting. For some reason, I kind of liken this situation to the phrase, “A tired dog is a happy dog.” You know, take your dog on a goddamn run so s/he won’t eat your couch. It’s as if I need to use up all my energy preparing something in order to be a less hyperactive and demanding person.

Before I expose too much of my nuttiness, here are the things I consider when coming up with a dinner menu for guests:

  1. How many people am I serving?
    This matters. While I may do something more complex and intricate for one guest, it may not be feasible or practical to do that on a larger scale for 5+ friends. When serving more than four total people, I will likely do something that involves fewer steps or one pot, like seared skirt steak, bibim guksu, braised pork ribs and cabbage, crab fried rice, or a risotto. On the other side of this, sometimes a bigger audience provides the best opportunity to try something more labor intensive that would be “wasted” on just me and my husband. For instance, we might want to one day host a Homemade Porchetta + Ciabatta + Beer party, and that would definitely work better for a larger group of guests.
  2. Do any of my guests have dietary restrictions?
    I always ask my dinner guests if they have any dietary restrictions or major dislikes. There is nothing more disappointing than watching loved ones try to eat something they hate, especially if it’s something I’ve made. If I have several guests, and only one of them is vegetarian or vegan, I will usually make a “family style” meal so that everyone has something to eat, and the vegetarian/vegan doesn’t have to be singled out. This serves as a nice parameter, because some dishes are better than others served in this fashion.
  3. What is my budget?
    For me, it’s important to determine the budget for dinner with guests so that I’m keeping track of all expenses. I never want to tip way over my usual spending, so this will often help me to figure out items for a delicious meal that won’t rob my wallet. For more on organizing around a budget, click here.
  4. What is the weather/temperature like?
    I think about this not because I don’t think one should eat stews in summer or salads in winter, but because I don’t want my guests to be uncomfortably hot or cold while they’re eating. If it’s hot in the apartment (either beacuse it’s a balmy 98 degrees outside, or it’s cold, but the heater is on a rampage), I’ll likely do something that doesn’t require much oven/stove use. Or, I’ll make something that can be roasted/cooked in advance, so the apartment doesn’t feel like an aroma sauna. If it’s cold in the apartment, I’ll make the warmest darn stew of all time. In mild and dry weather, anything is game.
  5. How much time do I have to prepare the meal?
    If given the choice, I would want to spend loads and loads of time preparing a meal for friends. But, people often come over on weekdays, which means that I have a short window between getting home from work and dinnertime to get shit ready. Of course, if I’m being particularly clever, I can prep some elements the night before, but I’m often not very smart. Even though this can seem like a bummer, time serves as helpful constraint. What dishes can I make in 1-2 hours that won’t exhaust me (who wants to dine with a grumpy and tired Yejin? NO ONE) but will still be tasty and well rounded? For last night’s guest, I made an appetizer, entree, side dish, and dessert in the span of 2 hours.
  6. Is there one thing in particular I want my guests to try?
    Based on all these other questions, which generally gives me a sense of what NOT to prepare, I will start planning my meal by selecting one element/dish I know I want to feed my guest. This is extremely helpful, and makes the process less stressful or overwhelming. Based on that one thing, you can then form the rest of your menu with complementary (or contradictory) items. Recently, I made Hainanese Chicken and Rice, and it was the best thing I had made all month. So, I wanted to share the joy with a friend who came over for dinner on Tuesday. Since the poulet served as an entrée, I started to think of other elements that would complement the light but earthy flavor of the dish. I thought it would be nice to start the meal with a simple and delicious kimchi pancake appetizer, since there is very little tang in the chicken. To accompany the entrée, I wanted a flavorful vegetable, but one that wouldn’t drown out the subtle taste and aromas of the entree. So I chose roasted brussel sprouts and shallots topped with a touch of fish sauce vinaigrette. Since the appetizer and main dish are both quite light, I wanted to end the evening with a deeply flavored and rich dessert. Enter Nigella Lawson’s dense chocolate loaf cake with bourbon and coffee, topped with homemade whipped cream and raspberries.

And, because I thought it’d be nice (and maybe a bit stifling and overwhelming), here are recipes for Tuesday’s meal:

  • Kimchi pancake
  • Hainanese Chicken and Rice
  • Roasted Brussel Sprouts and Shallots with Fish Sauce Vinaigrette
  • Nigella Lawson’s Chocolate Loaf Cake with Bourbon and Coffee

Processed with VSCOcam with hb1 preset

Kimchi Pancake Recipe
Recipe modified from Maangchi.com
Servings: 2-3
Prep Time: 10 minutes
Cooking Time: 10 minutes

Ingredients

1 cup of chopped kimchi
2 tablespoons of kimchi juice
3 chopped scallions
½ teaspoon of salt
½ teaspoon of sugar
½ cup of flour
¼ cup of water

Instructions

  1. Place kimchi, kimchi juice, scallions, salt, sugar, flour, and water into a medium sized bowl. Mix well with a spoon.
  2. Heat up a 12 inch non-stick pan over medium high heat and drizzle about two tablespoons of oil (canola or grapeseed is fine).
  3. Place the mixture of kimchi pancake batter on the pan and spread it thinly and evenly with a spoon.
  4. Cook it for 1 ½ minutes until the bottom becomes golden brown and crispy
  5. Turn it over with a spatula or flip it. Lower the heat to medium and cook for another 1 ½ minutes.
  6. Turn it over one more time and cook for 30 seconds before transferring it to a serving plate.

Processed with VSCOcam with a4 preset

Hainanese Chicken and Rice
Recipe taken from The Woks of Life
Servings: 4-5
Prep Time: 15 minutes
Cooking Time: 1 hour

Chicken Ingredients

1 whole fresh chicken, about 3-3 ½ pounds
1 tablespoon of salt
12-14 cups of water
4-5 slices of ginger
2 whole scallions
Ice 

Chicken Instructions

  1. Wash the chicken clean and remember to set aside the piece of chicken fat at the back cavity for the rice. Transfer the chicken to a plate and pat dry with a paper towel. Lightly rub the chicken with the salt. This will give the chicken skin a nice sheen. Set it aside.
  2. Bring the water, along with the ginger and scallions, to a boil in a large stockpot. Before adding the chicken to the pot, rinse the chicken under running water to wash away the salt. Carefully lower the chicken into the boiling water, positioning the chicken breast-side up. Now is a good time to adjust the water level so the chicken breast just pokes above the water (so you aren’t left with dry white meat).
  3. Once the water boils, carefully lift the chicken out of the water to pour out the colder water that is trapped in the cavity. Carefully lower the chicken back into the pot. Bring the water to boil again, and cover the lid. Turn off the heat, and leave the pot, covered, on the stove for 45-50 minutes (set a timer). To check if the chicken is done, stick a toothpick into the thickest part of the drumstick; if the juices run clear, it’s cooked through.
  4. When the 45-minute timer (for the chicken) is almost up, prepare a large ice bath. Once the chicken is cooked, carefully lift the chicken out of the pot, drain the water from the cavity and lower it into the ice bath. Take care not to break the skin. After 15 minutes in the ice bath, the chicken should be cooled, drain completely and cover with clear plastic until ready to cut and serve. The ice bath stops the cooking process, locks in the juices, and gives the chicken skin better texture.

Rice Ingredients

Chicken fat, taken from the back cavity of the chicken
4 cloves of garlic, minced
3 cups of white rice, preferably jasmine, washed and drained
Chicken stock, from cooking the chicken
2 teaspoons of salt

Rice Instructions

  1. While the chicken is cooling, make the rice. Heat a wok over medium heat. Add the chicken fat and render for about a minute. Stir in the minced garlic and fry briefly, making sure it doesn’t burn.
  2. Add the uncooked rice. Stir continuously for about two minutes.
  3. Turn off the heat. Scoop the rice into your rice cooker and add the appropriate amount of chicken stock (instead of the usual water. This amount may vary depending on your rice cooker) and salt. Close the lid and press START.
  4. If you don’t have a rice cooker, you can follow these steps. When you wash your rice, let it soak for an additional 20 minutes. Then drain the rice and follow the same steps above, but instead of transferring the rice mixture to your rice cooker, transfer it to a medium/large pot. Add 3 cups of chicken stock and the salt, giving it a quick stir. Cover the pot and bring to a boil. Once it boils,immediately turn down the heat to the lowest setting. Let the rice simmer and cook (covered) for 10-15 minutes until the rice is done. It’s not quite as foolproof as the rice cooker, but you should get a very similar result. Just be sure to keep an eye on it; burnt rice is no fun.

Sweet Dark Soy Sauce Ingredients

1/3 cup of water
3 tablespoons of rock sugar
1/3 cup of dark soy sauce

Sweet Dark Soy Sauce Instructions

Heat the water and sugar in a small saucepan over medium heat. Stir constantly until the sugar dissolves and the liquid thickens into a simple syrup. Add the dark soy sauce, stirring to combine. Transfer to a sauce dish.


Processed with VSCOcam with hb1 preset

Brussel Sprouts Oven Roasted And Fish Sauced
Recipe taken from iamafoodblog.com
Servings: 2-4 as a side
Prep Time: 15 minutes
Cooking Time: 45 minutes

Ingredients

1 clove of garlic, minced|
1 bird’s eye chili
1 tablespoon of sugar
Juice of ¼ a lime
½ cup of water
1 tablespoon of fish sauce
1 pound of Brussel sprouts
2 shallots, peeled and quartered
2 tablespoons of oil
Salt and pepper

Instructions

  1. Preheat the oven to 400°F.
  2. Crush the garlic, chili and sugar together in a mortar. Transfer to liquid measuring cup and dissolve the sugar, garlic and chili mixture with the water. Add the lime juice then fish sauce. Set aside.
  3. Trim the ends of the sprouts and remove any outer leaves that are loose or discoloured. Cut sprouts in half. Toss the cut sprouts and quartered shallots with oil and salt and pepper. Place in an oven-proof dish and roast, stirring every so often, until deeply browned, 35-40 minutes.
  4. Remove from the oven, toss with the fish sauce vinaigrette and enjoy immediately.

Processed with VSCOcam with hb1 preset

Nigella Lawson’s Dense Chocolate Loaf Cake

Recipe taken from Alexandra’s Kitchen
Source: Nigella Lawson’s 
How to Be a Domestic Goddess
Servings: 2 loaves
Prep Time: 20 minutes
Cooking Time: 45 minutes

Ingredients

1 cup soft unsalted butter
1 2/3 cup (316 g | 11 1/8 oz) dark brown sugar
1 1/3 cup (170 g) all-purpose flour
1 teaspoon baking soda
1 teaspoon sea salt, such as Maldon or Fleur de sel (or use 3/4 teaspoon kosher salt)
2 large eggs
1 tablespoon vanilla extract
4 ounces best bittersweet or semisweet chocolate, melted (I did this in the microwave at 30 second intervals, but don’t walk away — it will burn quickly)
2 tablespoons brandy or bourbon
1 cup freshly brewed coffee

Instructions

  1. Heat the oven to 375°F. Line a 9×5-inch loaf pan with parchment paper — just shove a whole sheet in there (versus cutting to make it fit — this way no batter will seep through the cracks). Also, prepare a smaller loaf pan (or some other vessel such as a muffin tin) in a similar manner — I butter the smaller loaf pan well, and I never have issues getting the cake out.
  2. Cream the butter and sugar, either with a wooden spoon or with an electric hand-held mixer.
  3. Meanwhile, whisk together the flour, baking soda and salt. Set aside.
  4. Add the eggs and vanilla to the butter-sugar mixture and beat until combined.
  5. Next, fold in the melted and now slightly cooled chocolate, taking care to blend well but being careful not to overbeat. You want the ingredients combined: You don’t want a light, airy mass. Add the brandy and mix to combine.
  6. Next, gently add the flour mixture alternately spoon by spoon with the coffee until you have a smooth and fairly liquid batter.
  7. Pour into the lined loaf pan, being sure the batter does not come closer than 1 inch from the rim of the cake pan or it risks overflowing. Pour the excess into the smaller prepared pan. Bake 30 minutes. Turn the oven down to 325 degrees and continue to cook for another 15 minutes. (I remove the smaller pan after the first 30 minutes.) The cake will still be a bit squidgy inside, so an inserted cake tester or skewer won’t come out completely clean. Place the loaf pan on a rack, and leave to get completely cold before turning it out. (Leave it for a whole day if you can resist.) Don’t worry if it sinks in the middle — it will do so because it’s such a dense and damp cake.

Processed with VSCOcam with hb1 preset

Coming Up…Introducing a New Series Honoring the Diverse Communities and Histories of the U.S. 

Meal Planning 101: Organizing around a Budget, plus a Pickled Egg Salad Recipe

In my first installment of the Meal Planning 101 series, I wrote about reusing versatile ingredients, which helps to tighten parameters, develop one’s palate, and save time and money. Truth be told, in response to my recent week-long “funk,” I went all out and spent way too much money on groceries for last week’s menu. I tend to function like a pendulum –either I’m on one side of an extreme or the other, and if I’m not, I’ve stopped moving and am probably dead. In any case, I thought it would be helpful to talk about budgeting. As you likely know by now, I like to impose limits and parameters on everything that I do, because the burden of choice can be too much for an anxious person like me. A budget is one of the most important frameworks, and can be really annoying to navigate when you’re a cravings-centric person like I am (lobster all the time, dammit!).

So, I’m not going to go through exactly how to budget one’s meal, because I think that the process, amount, and priorities are different for everyone depending on circumstances and preferences. What I’ll do, instead, is walk you through my general approach to choosing ingredients and meals based on a budget. To be clear, this post is not primarily about creating a menu based on a small/tight budget. I’ll do that another time.

Typically, I’m okay with spending an average of $14/day per person on groceries, and maybe a tad more when we host dinners with friends. Keep in mind that my husband and I rarely eat out or get delivery, even for lunch. This will cover breakfast, lunch, dinner, and when I’m feeling especially naughty, desserts and snacks. And, for the most part, my husband and I eat really, really well. There are definitely occasions when I need to spend less on groceries, whether it’s because I’ve just made a big purchase, and really need to replenish my piggy bank, or, those fleeting moments when I realize that I should have a LOT more dough stashed in a retirement fund, or when things are just generally tight. When that happens, here’s what I consider:

What can I spend?

The easiest and most important parameter is the actual budget. What can you/are you willing to spend on groceries, this week? This week, I gave myself a $120 budget.

What essential ingredients should I have in stock?

You may want to consider joining a place like Costco or Sam’s Club to stock up on essentials. Canned tomatoes and beans are always good to have on hand and are probably cheaper when buying in bulk. You can also grab important items like olive oil, vinegar, soy sauce, and other condiments when they’re on mega-sale somewhere, so you don’t have to constantly add these things to your grocery list.

What are some cheap go-to meals?

It’s always good to have some inexpensive meals in your pocket. I always make sure to have a pile of canned goods (tomatoes, beans), a variety of pastas, and rice. Also, I always have in stock essential items like onions, garlic, crushed red peppers, and anchovies. With these in place, I’m poised to make a cheap (and usually, quick) meal. Some of my go-to meals are: spaghetti aglio e olio (garlic and oil), pasta all’amatriciana, rice and beans, and pasta al pomodoro. This week, these dishes include a pasta al pomodoro, and a pickled egg salad.

What are cheaper ingredients?

When thinking about your meal for the week, it’s good to already have a sense of what foods are generally less expensive. For example, if you’re a meat-eater, chicken and pork are usually the cheaper options. Within the poultry category, dark meat is usually more affordable (and delicious), and bone-in cuts are generally even more forgiving on your wallet. I bought boneless/skinless chicken thighs for a katsu, and didn’t have to spend much dough for what will be a super filling and hearty meal. Consider the same thing with vegetables/produce, which are sadly often even more expensive than meat (thank the government’s insane subsidization of the meat industry) – generally, potatoes, cabbages, onions, carrots, and cauliflower are on the cheaper side of town. This may seem like a bummer, but there are so many wonderful things you can do with each of these ingredients. Cabbage was a good bet, and I’ve been enjoying a simple summer salad with raw red cabbage, carrots, and edamame.

What’s on sale?

Sales. Duh. Look at what’s on sale, see if anything is calling to you, and try to use those items as the basis for your menu. I saw that mussels were on sale, this week, and bought 2 pounds for a nice Moules Marinieres dish, that I’ll have with bread and a cabbage salad. Also, I got some beautiful branzino for roasting, which was only a whopping $5.99/lb.

Are there any foods/meals I MUST have, no question?

Admittedly, this isn’t always something we can ask ourselves when meal planning. I could say “I’m on a budget, but I must have caviar for breakfast every morning,” but that would be insane. However, if you are very in tune with what your body, heart, and soul crave, it can be helpful in setting more parameters for the rest of your meals. For example, this week’s menu is cheaper on the grocery-front, but I made sure I could still eat seafood, because that is what I’ve been craving. After purchasing crab meat, branzino, and mussels, it became clear that I had to be very mindful about the cost of ingredients for side dishes and the other meals. Though quinoa isn’t the most affordable grain out there, it was on sale, and I could combine some cheap canned goods (artichoke hearts and chickpeas) and some fresh vegetables for a hearty, filling, and relatively inexpensive meal/side dish.

Using these questions as a guide, here’s the menu I’ve come up with for the week (items in italics were on sale)

Monday, August 17

  • L: Salade Nicoise
  • D: Moules Marinieres (mussels cooked with garlic, shallots, white wine, and broth) + red cabbage, carrot and edamame salad + toasted bread

Tuesday, August 18

  • L: Quinoa salad w/ edamame, artichoke hearts, cherry tomatoes, yellow peppers, and chick peas
  • D: Roasted branzino + quinoa salad + asparagus

Wednesday, August 19

  • L: Leftover branzino w/ jasmine rice
  • D: Kimchi pancake + chicken thigh katsu + jasmine rice + red cabbage, carrot and edamame salad
  • Dessert: Homemade oreo ice cream sandwiches

Thursday, August 20

  • L: Chicken katsu sandwiches
  • D: Crab-fried rice + red cabbage, carrot and edamame salad

Friday, August 21

  • L: Pickled egg salad sandwiches
  • D: Spaghetti all’amatriciana

Saturday, August 22

  • L: Leftover pasta
  • D: Visiting family in NJ

Including breakfasts, which usually include toast, or granola + yogurt (not worthy of listing above), my husband and I spent a total of $24/day for what’s still a relatively happening menu. This also factors in extra groceries for certain meals since we will be hosting guests. I totally acknowledge that what I’ve spent is certainly not nothing, and that it may not be a reasonable budget for many. But, the questions I posed above can help someone navigate a budget of any size.

And now, for my favorite egg salad recipe.

Processed with VSCOcam with a6 preset

Pickled Egg Salad
Recipe taken and modified from Bon Appetit
Servings: 6
Prep Time: 25 minutes
Cooking Time: 10

Ingredients

  • ½ cup apple cider vinegar
  • ½ cup distilled white vinegar
  • 1 teaspoon sugar
  • 1½ teaspoons kosher salt, plus more
  • 8 large eggs
  • 1/3 cup mayonnaise
  • ¼ cup finely chopped fresh chives
  • ¼ of finely chopped fresh parsley
  • Freshly ground black pepper
  • Bread for serving
  • Serrano ham or prosciutto for serving (optional)

Instructions

  1. Bring vinegars, sugar, 1½ tsp. salt, and ½ cup water to a simmer in a medium saucepan. Let cool.
  2. Meanwhile, place eggs in a medium saucepan and add water to cover by 2”. Bring to a boil, cover, and remove from heat. Let sit 10 minutes. Transfer eggs to a bowl of ice water to cool. Drain, peel, and return to bowl. Add pickling liquid; cover and chill at least 12 hours. Remove eggs from pickling liquid. Coarsely chop; mix with mayonnaise, scallions or chives, and parsley in a medium bowl. Season with salt, pepper, and some pickling liquid, if desired. (I used about 2 teaspoons.)
  3. Top bread with pickled egg salad, some chervil (if using), and a slice of ham or prosciutto (if using).
  4. Do Ahead: Eggs can be pickled 1 week ahead. Keep chilled.

Coming up on the Meal Planning 101 Series: On Navigating Time Constraints

Meal Planning 101: On Reusing Versatile Ingredients, plus a “Nourish Bowl” Recipe

As I’ve mentioned in previous posts, my initial motivation to schedule all my meals came from anxiety – anxiety that I would be wasteful with ingredients (and therefore money), that I wouldn’t enjoy my food. It’s become much more than that, more than a pressure valve for my neurosis. It’s a way for me to think creatively, to exercise a kind of freedom that only exists in the presence of strict parameters.

I’ve tried to outline a Meal Planning 101 entry, but found that a singular post would be far too long and verbose, and probably super boring. So, I’ve decided to start a series, highlighting different elements of my planning process. This first one is going to be about thinking ahead and reusing ingredients, and I’ll go through my thought process behind this week’s menu.

The process of reusing ingredients is important to me for a number of reasons:

  1. It tightens parameters. I don’t know if you know this, but there are like a gazillion food blogs (read: food porn sites) and a bajillion recipes for everything. Diving into the endless abyss of books and blogs to find that perfect dish is probably a gigantic time suck, and this helps. And, even though I like planning stuff out (clearly), sometimes I find it exhausting to make completely new things, everyday, and to find delectable recipes for each. Choosing versatile ingredients that I can reuse gives me a weird sort of peace of mind.
  2. It helps me to develop my palate. I learn more about the ingredient when I cook it in a number of different styles. Also, by focusing on one or more reusable ingredients for a week’s meal, I have the opportunity to actually taste different ingredient pairings and formulate my own opinions.
  3. It can save time. For example, I can prepare the ingredient for the whole week in one fell swoop (e.g. trimming or blanching vegetables), or cook the ingredient(s) in one batch and use them throughout the week.
  4. It can save money. I am often on the prowl for what’s on sale or in season. If I’m okay with reusing an ingredient or two throughout the week, it means that I can spend less money. Also, if I find that I’m reusing a great deal of something (an example for me would be jasmine rice), then I can save some money by purchasing in bulk.

There are obviously other elements to meal-planning. Often, I’ll start with what kind of stuff I’m craving, or what I think my body needs. But the focus on ingredients and how I can make them versatile is a key element to my planning process, one that I use every week.

This Week’s Meals

This week, because my husband is on tour (I’m lonely!), I’m making a lot of one-pot meals, reusing loads of ingredients/elements, and cooking things that are easy to bring to work. Additionally, because it’s been getting warmer, I want to cook and eat things that don’t make me feel like a sweaty slimeball. Here were some of my thoughts in coming up with the menu:

  • I wanted a versatile grain that would be good either hot or cold. I chose farro, because it’s not one of the foods that just tastes really healthy (read: boring or icky), it is healthy but has a relatively complex character. I can cook all of my farro at the same time, and use it for different meals to save on time.
  • Honestly, after a week of eating very little meat (since we binged in Maine), I am craving some animal. I decided to go the chicken route, since it’s kind of on the lighter side. And I’m not afraid to admit this to the world: I like eating chicken. Like, I like it a lot. So, I bought enough chicken for roasting, and for ddak bulgogi (Korean chicken BBQ). The latter will be its own meal (with rice or farro), and then serve as toppers for farro bibimbap and bibimguksu.
  • Roasted vegetables are amazing on or with everything. I’m going to roast a bunch of vegetables on a cool morning (w/ my new spice mix obsession for vegetables: salt, pepper, cumin, chili powder, cayenne, and paprika). Then, I’ll use them as a side for rice & beans, cheese omelette and fish in a bag. And, they will serve as integral elements to my farro nourish bowl.
  • Eggs. I love them so much. This week, I’ll pickle some soft-boiled eggs as part of all the rice or farro dishes. Also, since I’m allowed to be “lazy” while Nico is on tour, I’m going to make myself a delicious and easy omelette, one night.

I should also add that I needed all the meals to be relatively simple, since I had my first trip to the Emergency Room (as an adult) on Wednesday. Apparently, I have pretty severe vertigo, so lots of movement, or movement at all, is pretty disorienting and disconcerting. WOMP.

Now, with all the context, here is the weeks’ menu:

FRIDAY

  • D: Fish in a bag, w/ lemon, fennel, olives, and white wine sauce

SATURDAY

  • L: Farro nourish bowl w/ roasted vegetables and a pickled egg, topped w/ lime dressing
  • D: Bibim guksu w/ chicken bulgogi

SUNDAY

  • L: Leftover bibimguksu
  • D: Chicken bulgogi w/ jasmine rice and roasted vegetables

MONDAY

  • L: Leftover bulgogi, rice, and vegetables
  • D: Farro bibimbap w/ chicken bulgogi topping and a pickled egg, and an arugula salad

TUESDAY

  • L: Leftover farro bibimbap
  • D: Brie omelette, baguette, and an arugula salad

WEDNESDAY

  • L: Leftovers (of anything)
  • D: Roasted chicken thigh w. cherry tomatoes & asparagus, baguette, and an arugula salad

THURSDAY

  • L: Leftover chicken
  • D: Rice & beans and roasted vegetables

FRIDAY

  • L: Leftover rice & beans
  • D: ORDER DELIVERY (woohoooo)

And, here’s a recipe for an amazingly simple farro nourish bowl that has swept me off my feet. By the way, I think the term “nourish bowl” is the worst, like it’s the top selling (and only) food item at a CA smoothie store. But, it’s easier to say that, than to say “healthy but delicious bowl of grain with other hearty and mostly vegetarian toppings.”

Processed with VSCOcam with c1 preset

Farro “Nourish Bowl” with Roasted Vegetables and Lime/Maple Dressing
Adapted from Cookie Monster Cooking’s Blog
Servings: 4-6
Prep Time: 20 minutes
Cooking Time: 45 minutes

Ingredients
Roasted Vegetables:
  • 1 medium red onion, sliced
  • 2 small or 1 large yukon gold potato, peeled and chopped into ½ inch chunks
  • 1 large sweet potato, peeled and chopped into ½ inch chunks
  • 2 large carrots, peeled and chopped
  • 2 heads of broccoli, chopped
  • 2 ears of corn kernels (cut right off the cob)
  • 2 tablespoons of olive oil
  • 1 tablespoon of canola oil
  • 1 teaspoon cumin
  • 1 teaspoon smoked paprika
  • 1 teaspoon chili powder
  • ½ teaspoon cayenne
  • 1 teaspoon salt
For the dressing:
  • 2 tablespoons freshly squeezed lime juice
  • 1 tablespoon pure maple syrup
  • ¼ teaspoon salt
  • pinch of pepper
  • ¼ cup olive oil
For serving:
  • Farro, cooked per instructions
  • Avocado, sliced on top
  • Pickled egg

Instructions

  1. Preheat the oven to 400ºF.
  2. Chop up all the vegetables, and place them into a large bowl. add the cumin, paprika, chili powder, cayenne pepper, salt, olive oil, and canola oil. Mix well, and place the vegetables onto a baking sheet (use two if necessary – you don’t want to crowd the pan).
  3. Bake for 40 minutes, and stir halfway through. The vegetables should be beautifully browned and aromatic.
  4. In a small bowl, whisk together the ingredients for the dressing.
  5. To serve, place some farro in a bowl, and add the roasted veggies, sliced avocado, and pickled egg on top. Dress with the lime/maple syrup mixture, and enjoy!