Disclaimer: I am back to my verbose ways, and this entry is long. My promises mean nothing, but I’m pretty sure the next post will be short. Bear with me!
Psst. Want to know a secret? I’m an effusive person.
Gasp! It’s probably painfully obvious that I lack restraint when demonstrating and articulating my love for people (and food and TV). Why? Enter the Myers-Briggs Personality Test. Though I don’t fully buy into it, I’ve found the test and its analysis helpful in understanding what motivates me. And, true to obsessive form, I’ve taken the Myers –Briggs Personality Test at least 10 times in my life, all with the same result. I am solidly an ENFJ. According to 16personalities.com:
“ENFJs are natural-born leaders, full of passion and charisma. Forming around two percent of the population, they are oftentimes our politicians, our coaches and our teachers, reaching out and inspiring others to achieve and to do good in the world. With a natural confidence that begets influence, ENFJs take a great deal of pride and joy in guiding others to work together to improve themselves and their community.”
There’s the good. Here’s the rub:
“While ENFJs enjoy lending this helping hand, other personality types may simply not have the energy or drive to keep up with it – creating further strain, people with the ENFJ personality type can become offended if their efforts aren’t reciprocated when the opportunity arises. Ultimately, ENFJs’ give and take can become stifling to types who are more interested in the moment than the future, or who simply have Identities that rest firmly on the Assertive side, making them content with who they are and uninterested in the sort of self-improvement and goal-setting that ENFJs hold so dear.”
Stifling. I’m stifling! Oh god. Oh yikes.
So, in the last year I’ve been trying to redirect my somewhat manic desire to demonstrate (and receive) love in my ideal form* towards something more palatable and enjoyable for all parties. I do this by cooking for people.
*ideal form: I hold your face in my hands, you hold my face in your hands, we look deep into each other’s eyes and talk about the ins and outs of everything we hold dear until our souls are exhausted by satiation.

This is generally what it looks like when I love someone.
Though I’m still a bit intense whilst coming up with a menu for dinner guests, at least my friends won’t feel suffocated from my effort – they’ll just eat something that is hopefully tasty and comforting. For some reason, I kind of liken this situation to the phrase, “A tired dog is a happy dog.” You know, take your dog on a goddamn run so s/he won’t eat your couch. It’s as if I need to use up all my energy preparing something in order to be a less hyperactive and demanding person.
Before I expose too much of my nuttiness, here are the things I consider when coming up with a dinner menu for guests:
- How many people am I serving?
This matters. While I may do something more complex and intricate for one guest, it may not be feasible or practical to do that on a larger scale for 5+ friends. When serving more than four total people, I will likely do something that involves fewer steps or one pot, like seared skirt steak, bibim guksu, braised pork ribs and cabbage, crab fried rice, or a risotto. On the other side of this, sometimes a bigger audience provides the best opportunity to try something more labor intensive that would be “wasted” on just me and my husband. For instance, we might want to one day host a Homemade Porchetta + Ciabatta + Beer party, and that would definitely work better for a larger group of guests. - Do any of my guests have dietary restrictions?
I always ask my dinner guests if they have any dietary restrictions or major dislikes. There is nothing more disappointing than watching loved ones try to eat something they hate, especially if it’s something I’ve made. If I have several guests, and only one of them is vegetarian or vegan, I will usually make a “family style” meal so that everyone has something to eat, and the vegetarian/vegan doesn’t have to be singled out. This serves as a nice parameter, because some dishes are better than others served in this fashion. - What is my budget?
For me, it’s important to determine the budget for dinner with guests so that I’m keeping track of all expenses. I never want to tip way over my usual spending, so this will often help me to figure out items for a delicious meal that won’t rob my wallet. For more on organizing around a budget, click here. - What is the weather/temperature like?
I think about this not because I don’t think one should eat stews in summer or salads in winter, but because I don’t want my guests to be uncomfortably hot or cold while they’re eating. If it’s hot in the apartment (either beacuse it’s a balmy 98 degrees outside, or it’s cold, but the heater is on a rampage), I’ll likely do something that doesn’t require much oven/stove use. Or, I’ll make something that can be roasted/cooked in advance, so the apartment doesn’t feel like an aroma sauna. If it’s cold in the apartment, I’ll make the warmest darn stew of all time. In mild and dry weather, anything is game. - How much time do I have to prepare the meal?
If given the choice, I would want to spend loads and loads of time preparing a meal for friends. But, people often come over on weekdays, which means that I have a short window between getting home from work and dinnertime to get shit ready. Of course, if I’m being particularly clever, I can prep some elements the night before, but I’m often not very smart. Even though this can seem like a bummer, time serves as helpful constraint. What dishes can I make in 1-2 hours that won’t exhaust me (who wants to dine with a grumpy and tired Yejin? NO ONE) but will still be tasty and well rounded? For last night’s guest, I made an appetizer, entree, side dish, and dessert in the span of 2 hours. - Is there one thing in particular I want my guests to try?
Based on all these other questions, which generally gives me a sense of what NOT to prepare, I will start planning my meal by selecting one element/dish I know I want to feed my guest. This is extremely helpful, and makes the process less stressful or overwhelming. Based on that one thing, you can then form the rest of your menu with complementary (or contradictory) items. Recently, I made Hainanese Chicken and Rice, and it was the best thing I had made all month. So, I wanted to share the joy with a friend who came over for dinner on Tuesday. Since the poulet served as an entrée, I started to think of other elements that would complement the light but earthy flavor of the dish. I thought it would be nice to start the meal with a simple and delicious kimchi pancake appetizer, since there is very little tang in the chicken. To accompany the entrée, I wanted a flavorful vegetable, but one that wouldn’t drown out the subtle taste and aromas of the entree. So I chose roasted brussel sprouts and shallots topped with a touch of fish sauce vinaigrette. Since the appetizer and main dish are both quite light, I wanted to end the evening with a deeply flavored and rich dessert. Enter Nigella Lawson’s dense chocolate loaf cake with bourbon and coffee, topped with homemade whipped cream and raspberries.
And, because I thought it’d be nice (and maybe a bit stifling and overwhelming), here are recipes for Tuesday’s meal:
- Kimchi pancake
- Hainanese Chicken and Rice
- Roasted Brussel Sprouts and Shallots with Fish Sauce Vinaigrette
- Nigella Lawson’s Chocolate Loaf Cake with Bourbon and Coffee
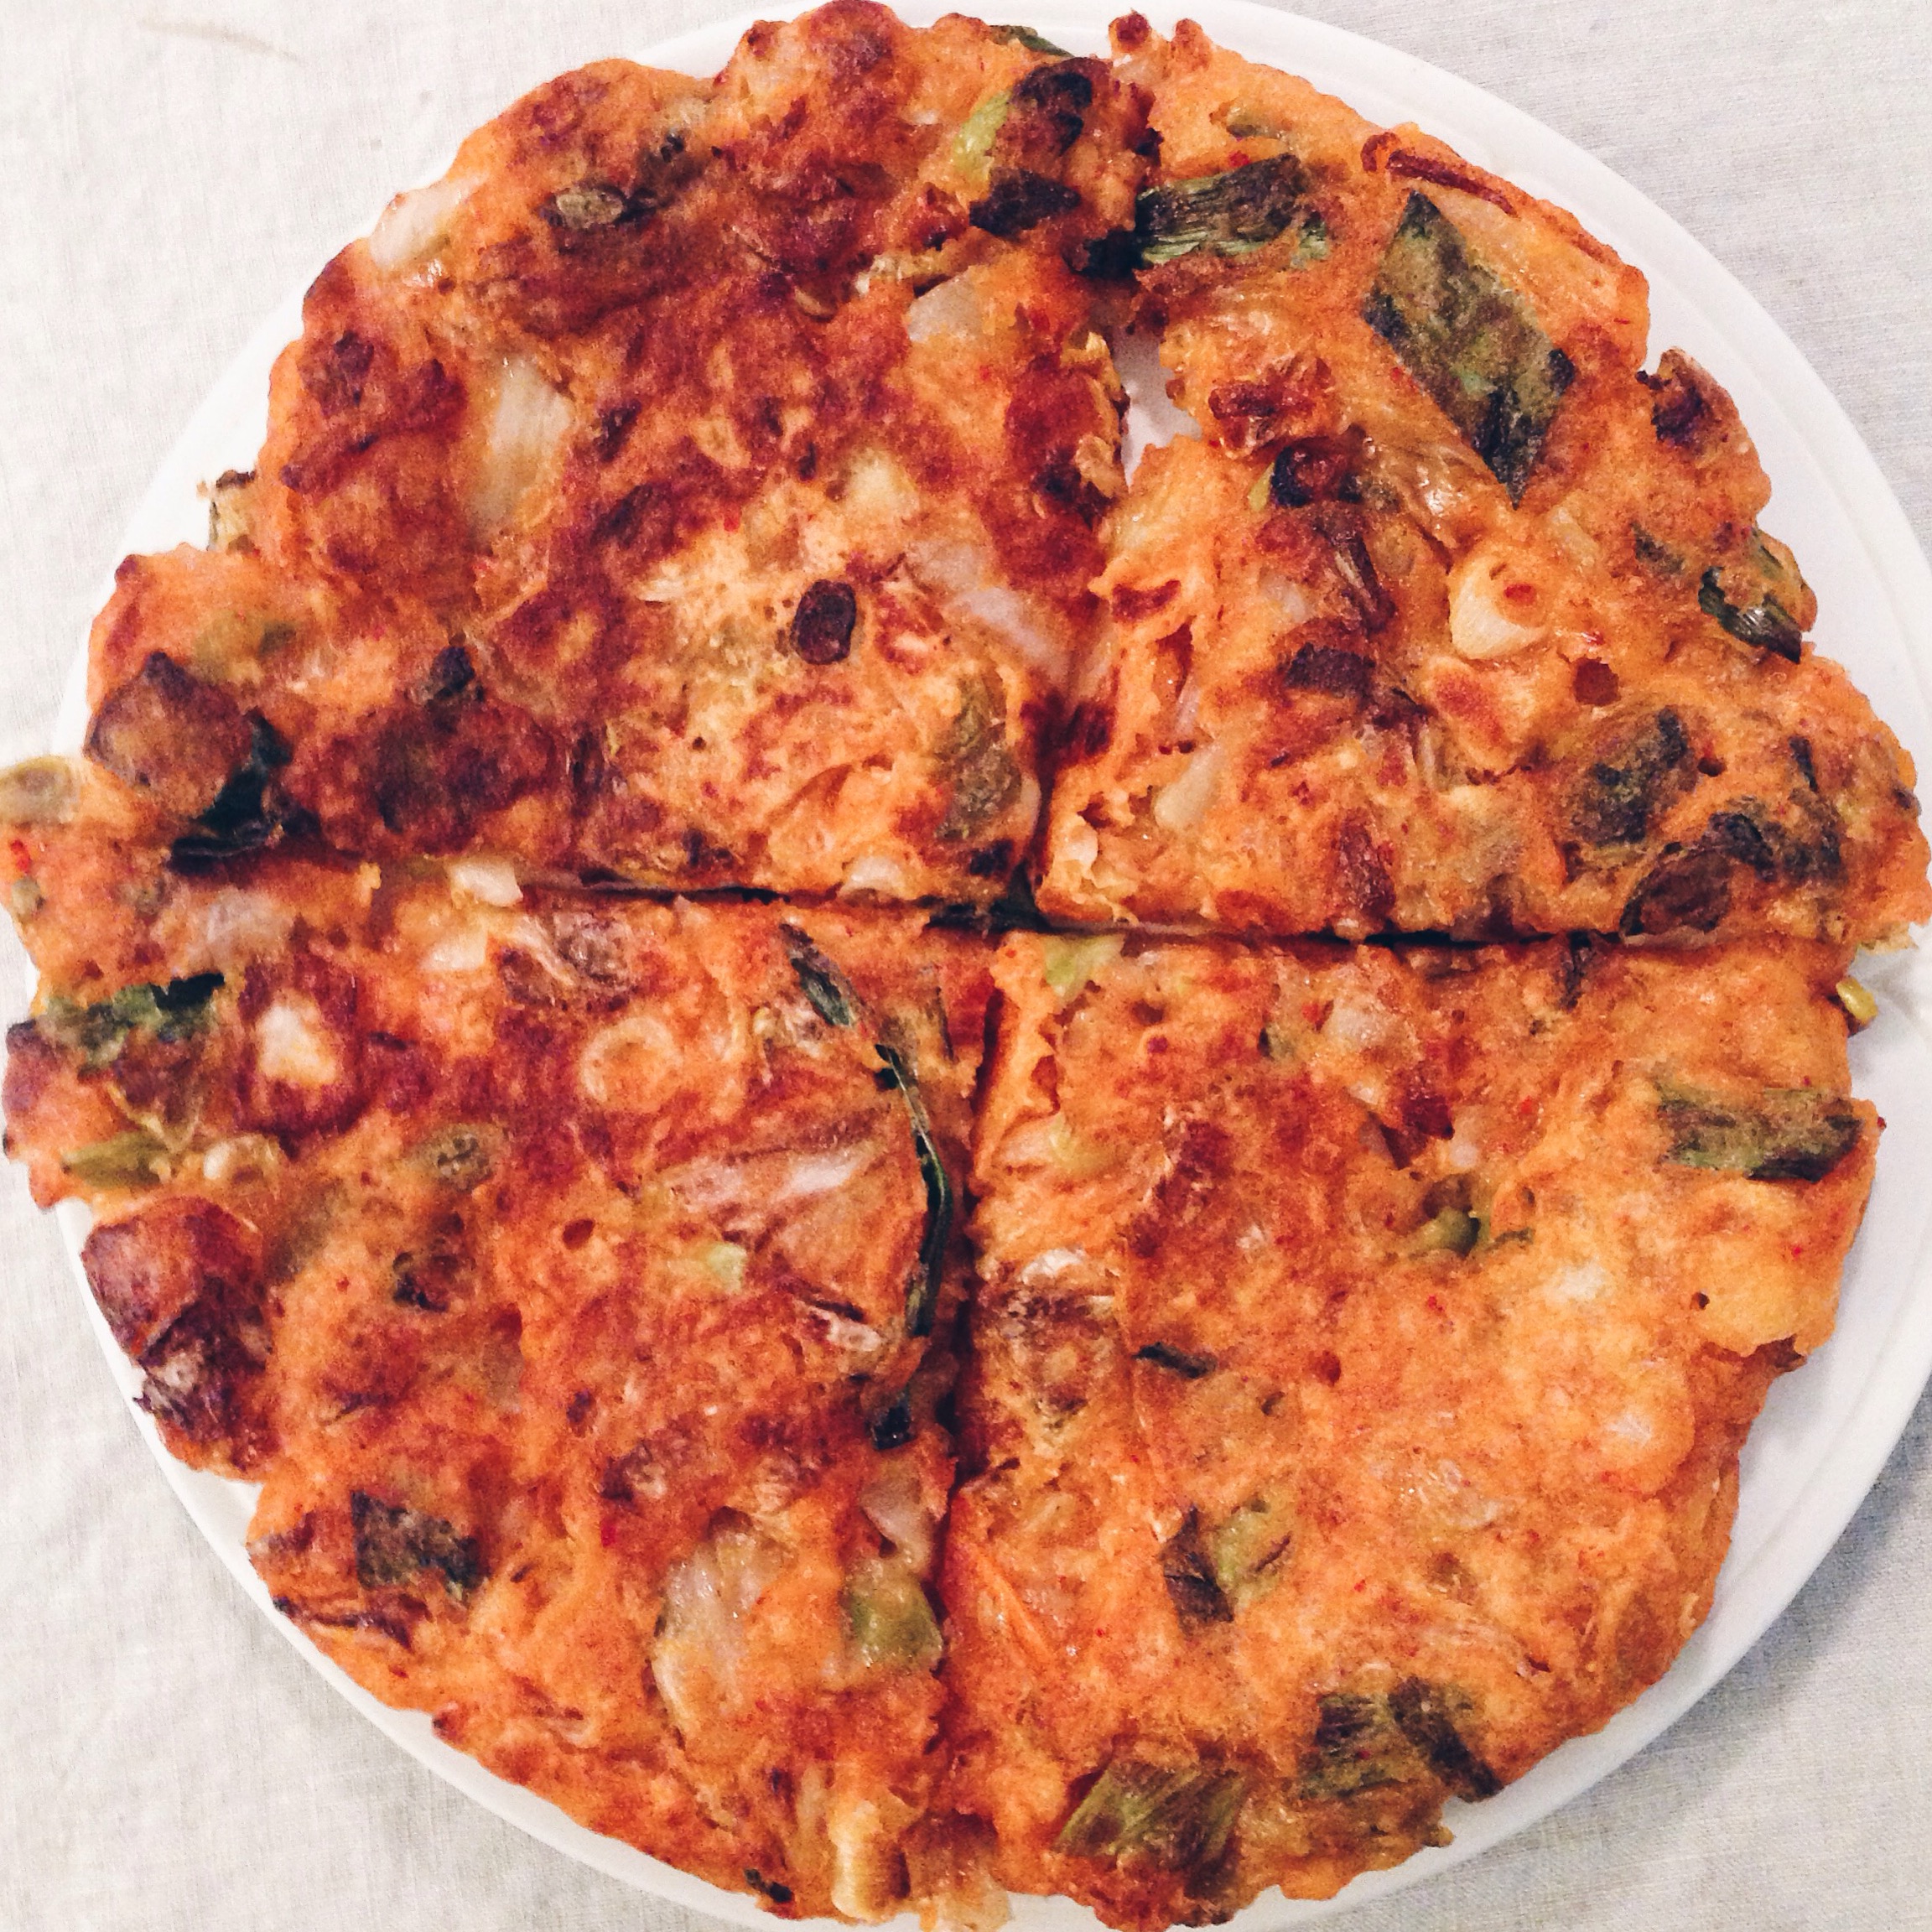
Kimchi Pancake Recipe
Recipe modified from Maangchi.com
Servings: 2-3
Prep Time: 10 minutes
Cooking Time: 10 minutes
Ingredients
1 cup of chopped kimchi
2 tablespoons of kimchi juice
3 chopped scallions
½ teaspoon of salt
½ teaspoon of sugar
½ cup of flour
¼ cup of water
Instructions
- Place kimchi, kimchi juice, scallions, salt, sugar, flour, and water into a medium sized bowl. Mix well with a spoon.
- Heat up a 12 inch non-stick pan over medium high heat and drizzle about two tablespoons of oil (canola or grapeseed is fine).
- Place the mixture of kimchi pancake batter on the pan and spread it thinly and evenly with a spoon.
- Cook it for 1 ½ minutes until the bottom becomes golden brown and crispy
- Turn it over with a spatula or flip it. Lower the heat to medium and cook for another 1 ½ minutes.
- Turn it over one more time and cook for 30 seconds before transferring it to a serving plate.

Hainanese Chicken and Rice
Recipe taken from The Woks of Life
Servings: 4-5
Prep Time: 15 minutes
Cooking Time: 1 hour
Chicken Ingredients
1 whole fresh chicken, about 3-3 ½ pounds
1 tablespoon of salt
12-14 cups of water
4-5 slices of ginger
2 whole scallions
Ice
Chicken Instructions
- Wash the chicken clean and remember to set aside the piece of chicken fat at the back cavity for the rice. Transfer the chicken to a plate and pat dry with a paper towel. Lightly rub the chicken with the salt. This will give the chicken skin a nice sheen. Set it aside.
- Bring the water, along with the ginger and scallions, to a boil in a large stockpot. Before adding the chicken to the pot, rinse the chicken under running water to wash away the salt. Carefully lower the chicken into the boiling water, positioning the chicken breast-side up. Now is a good time to adjust the water level so the chicken breast just pokes above the water (so you aren’t left with dry white meat).
- Once the water boils, carefully lift the chicken out of the water to pour out the colder water that is trapped in the cavity. Carefully lower the chicken back into the pot. Bring the water to boil again, and cover the lid. Turn off the heat, and leave the pot, covered, on the stove for 45-50 minutes (set a timer). To check if the chicken is done, stick a toothpick into the thickest part of the drumstick; if the juices run clear, it’s cooked through.
- When the 45-minute timer (for the chicken) is almost up, prepare a large ice bath. Once the chicken is cooked, carefully lift the chicken out of the pot, drain the water from the cavity and lower it into the ice bath. Take care not to break the skin. After 15 minutes in the ice bath, the chicken should be cooled, drain completely and cover with clear plastic until ready to cut and serve. The ice bath stops the cooking process, locks in the juices, and gives the chicken skin better texture.
Rice Ingredients
Chicken fat, taken from the back cavity of the chicken
4 cloves of garlic, minced
3 cups of white rice, preferably jasmine, washed and drained
Chicken stock, from cooking the chicken
2 teaspoons of salt
Rice Instructions
- While the chicken is cooling, make the rice. Heat a wok over medium heat. Add the chicken fat and render for about a minute. Stir in the minced garlic and fry briefly, making sure it doesn’t burn.
- Add the uncooked rice. Stir continuously for about two minutes.
- Turn off the heat. Scoop the rice into your rice cooker and add the appropriate amount of chicken stock (instead of the usual water. This amount may vary depending on your rice cooker) and salt. Close the lid and press START.
- If you don’t have a rice cooker, you can follow these steps. When you wash your rice, let it soak for an additional 20 minutes. Then drain the rice and follow the same steps above, but instead of transferring the rice mixture to your rice cooker, transfer it to a medium/large pot. Add 3 cups of chicken stock and the salt, giving it a quick stir. Cover the pot and bring to a boil. Once it boils,immediately turn down the heat to the lowest setting. Let the rice simmer and cook (covered) for 10-15 minutes until the rice is done. It’s not quite as foolproof as the rice cooker, but you should get a very similar result. Just be sure to keep an eye on it; burnt rice is no fun.
Sweet Dark Soy Sauce Ingredients
1/3 cup of water
3 tablespoons of rock sugar
1/3 cup of dark soy sauce
Sweet Dark Soy Sauce Instructions
Heat the water and sugar in a small saucepan over medium heat. Stir constantly until the sugar dissolves and the liquid thickens into a simple syrup. Add the dark soy sauce, stirring to combine. Transfer to a sauce dish.
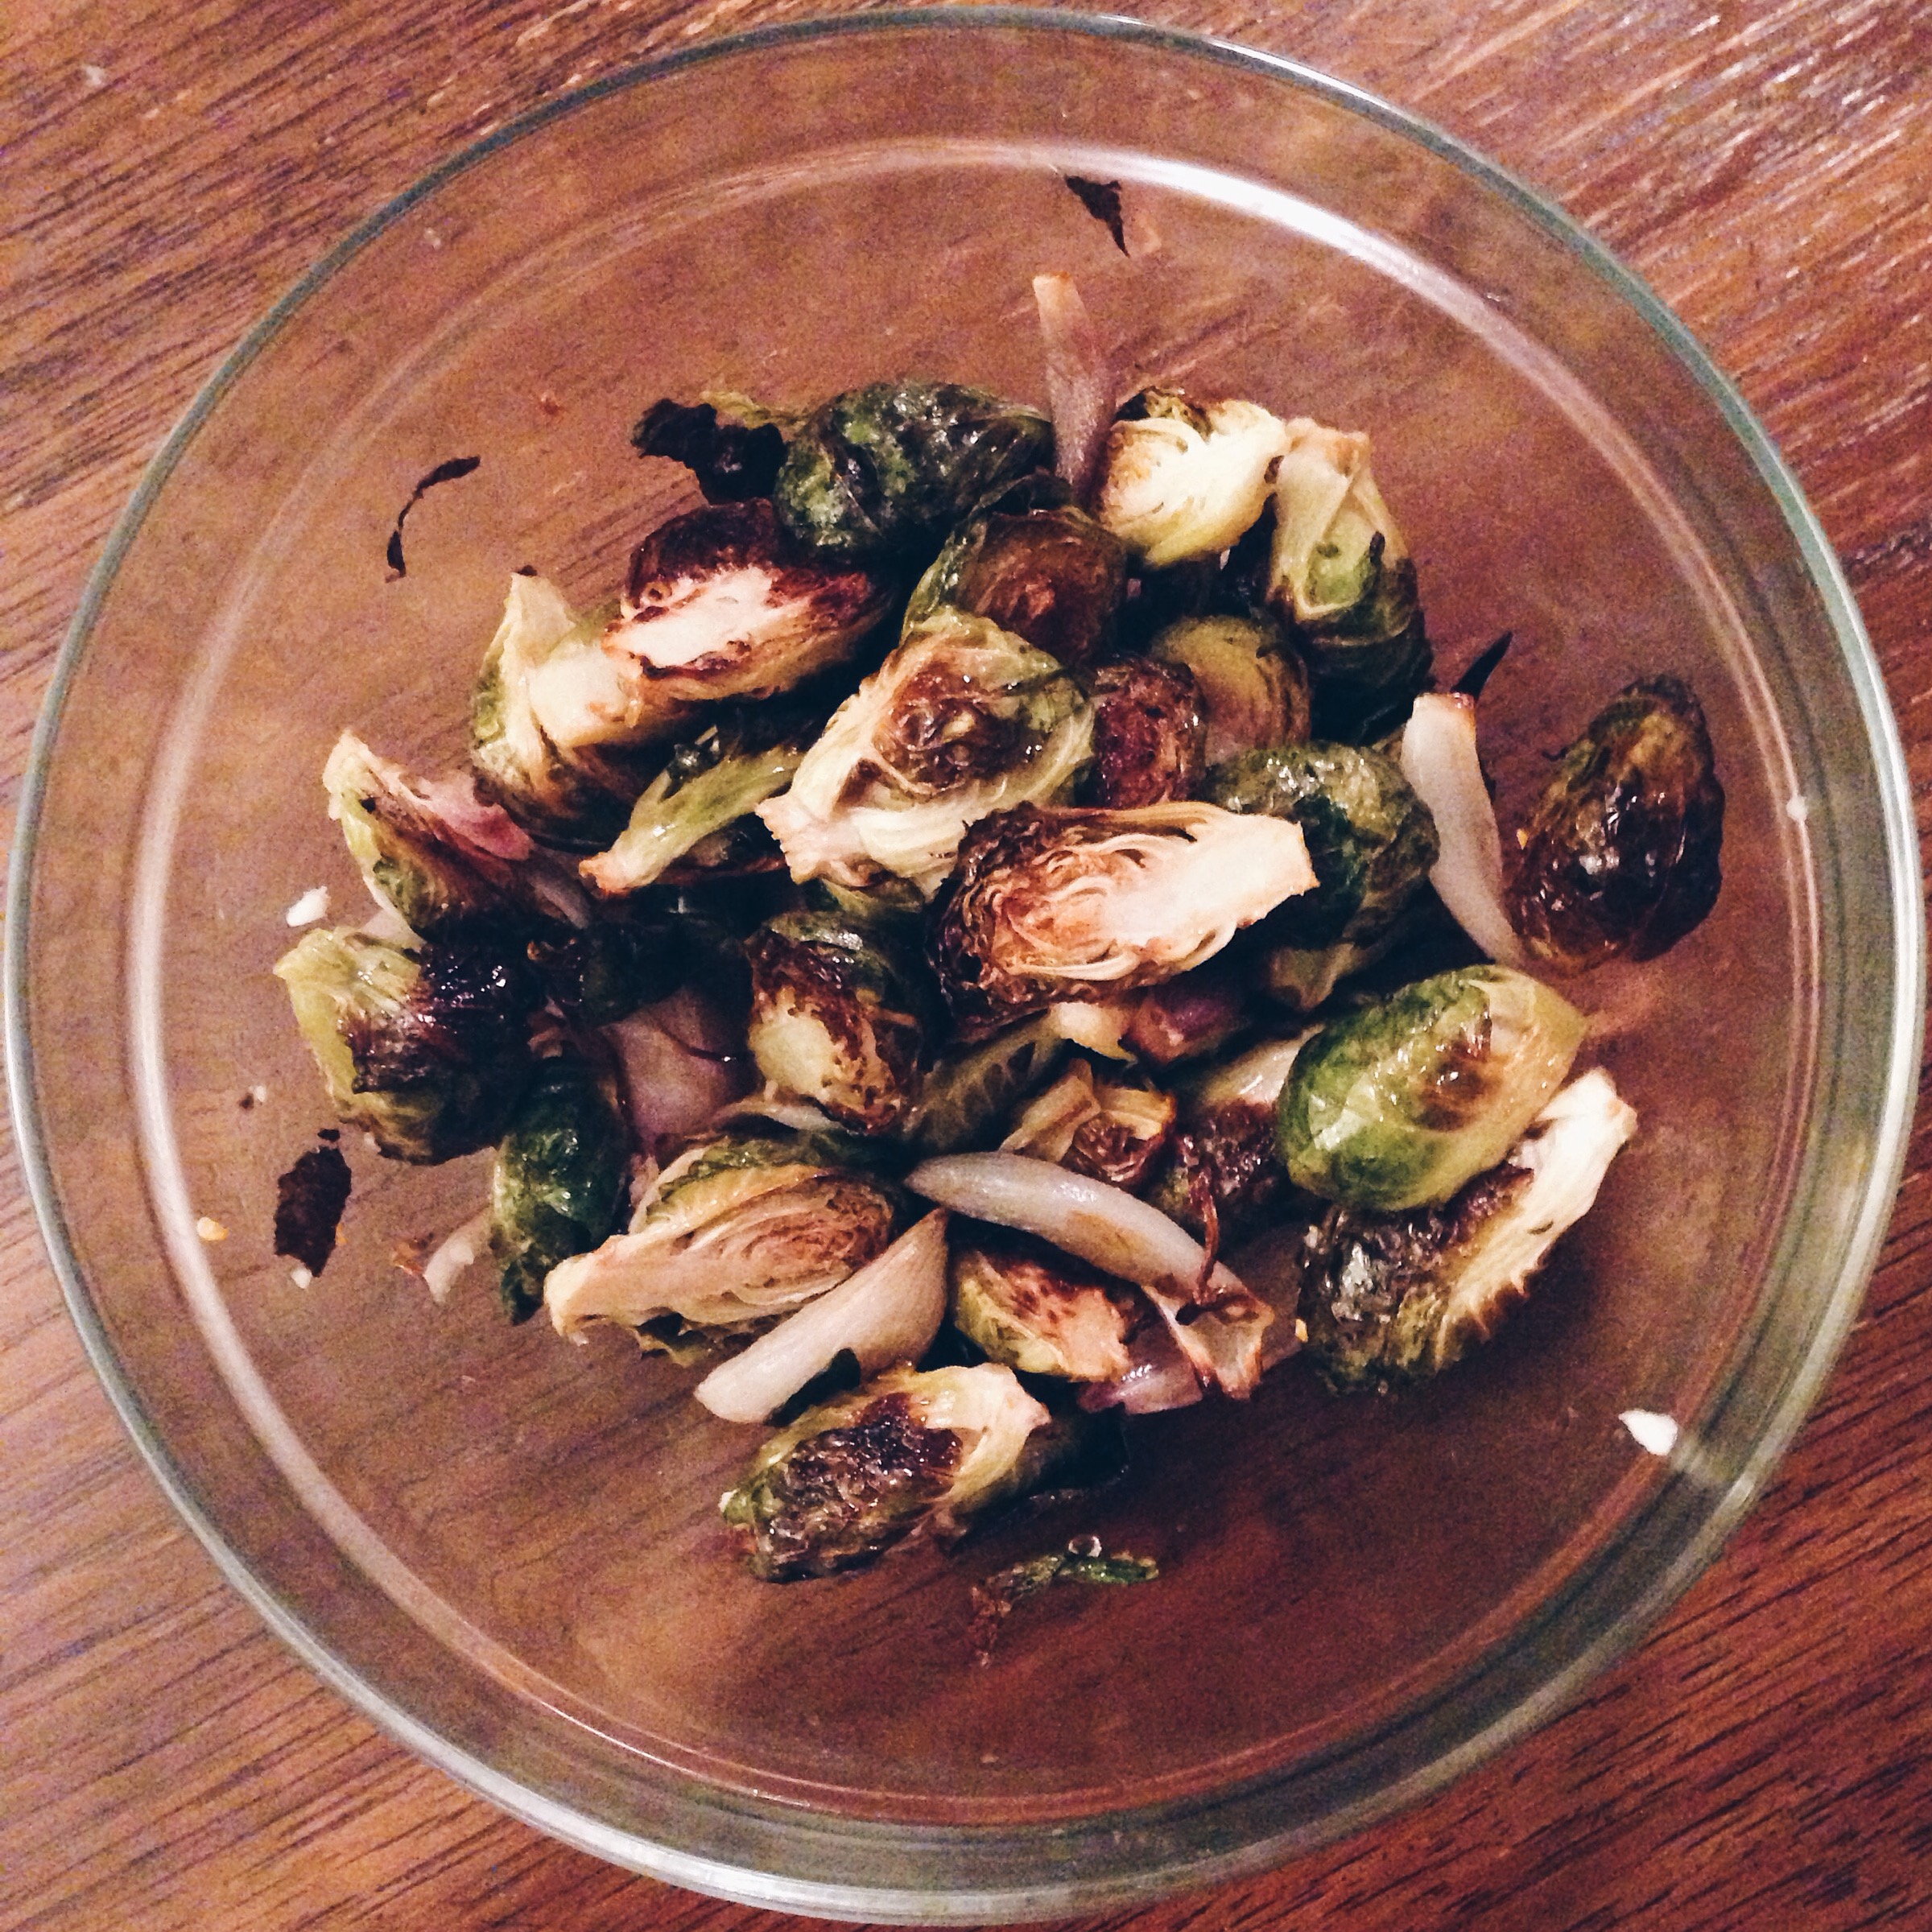
Brussel Sprouts Oven Roasted And Fish Sauced
Recipe taken from iamafoodblog.com
Servings: 2-4 as a side
Prep Time: 15 minutes
Cooking Time: 45 minutes
Ingredients
1 clove of garlic, minced|
1 bird’s eye chili
1 tablespoon of sugar
Juice of ¼ a lime
½ cup of water
1 tablespoon of fish sauce
1 pound of Brussel sprouts
2 shallots, peeled and quartered
2 tablespoons of oil
Salt and pepper
Instructions
- Preheat the oven to 400°F.
- Crush the garlic, chili and sugar together in a mortar. Transfer to liquid measuring cup and dissolve the sugar, garlic and chili mixture with the water. Add the lime juice then fish sauce. Set aside.
- Trim the ends of the sprouts and remove any outer leaves that are loose or discoloured. Cut sprouts in half. Toss the cut sprouts and quartered shallots with oil and salt and pepper. Place in an oven-proof dish and roast, stirring every so often, until deeply browned, 35-40 minutes.
- Remove from the oven, toss with the fish sauce vinaigrette and enjoy immediately.

Nigella Lawson’s Dense Chocolate Loaf Cake
Recipe taken from Alexandra’s Kitchen
Source: Nigella Lawson’s How to Be a Domestic Goddess
Servings: 2 loaves
Prep Time: 20 minutes
Cooking Time: 45 minutes
Ingredients
1 cup soft unsalted butter
1 2/3 cup (316 g | 11 1/8 oz) dark brown sugar
1 1/3 cup (170 g) all-purpose flour
1 teaspoon baking soda
1 teaspoon sea salt, such as Maldon or Fleur de sel (or use 3/4 teaspoon kosher salt)
2 large eggs
1 tablespoon vanilla extract
4 ounces best bittersweet or semisweet chocolate, melted (I did this in the microwave at 30 second intervals, but don’t walk away — it will burn quickly)
2 tablespoons brandy or bourbon
1 cup freshly brewed coffee
Instructions
- Heat the oven to 375°F. Line a 9×5-inch loaf pan with parchment paper — just shove a whole sheet in there (versus cutting to make it fit — this way no batter will seep through the cracks). Also, prepare a smaller loaf pan (or some other vessel such as a muffin tin) in a similar manner — I butter the smaller loaf pan well, and I never have issues getting the cake out.
- Cream the butter and sugar, either with a wooden spoon or with an electric hand-held mixer.
- Meanwhile, whisk together the flour, baking soda and salt. Set aside.
- Add the eggs and vanilla to the butter-sugar mixture and beat until combined.
- Next, fold in the melted and now slightly cooled chocolate, taking care to blend well but being careful not to overbeat. You want the ingredients combined: You don’t want a light, airy mass. Add the brandy and mix to combine.
- Next, gently add the flour mixture alternately spoon by spoon with the coffee until you have a smooth and fairly liquid batter.
- Pour into the lined loaf pan, being sure the batter does not come closer than 1 inch from the rim of the cake pan or it risks overflowing. Pour the excess into the smaller prepared pan. Bake 30 minutes. Turn the oven down to 325 degrees and continue to cook for another 15 minutes. (I remove the smaller pan after the first 30 minutes.) The cake will still be a bit squidgy inside, so an inserted cake tester or skewer won’t come out completely clean. Place the loaf pan on a rack, and leave to get completely cold before turning it out. (Leave it for a whole day if you can resist.) Don’t worry if it sinks in the middle — it will do so because it’s such a dense and damp cake.

Coming Up…Introducing a New Series Honoring the Diverse Communities and Histories of the U.S.


